Pulse butter, kimchi and kimchi juice, and salt in a food processor, scraping down sides as needed, until kimchi is finely chopped and fully incorporated into butter. Cover and store at room temperature.
Kimchi butter can be made 3 days ahead. Chill.
Chicken
Grind coriander seeds, red pepper flakes, lemon zest, black peppercorns, cumin seeds, and 4 tsp. salt in a spice mill or with a mortar and pestle until very finely ground.
Place chicken, skin side up, on a rimmed baking sheet. Using the heel of your hands, press firmly on breastbone to flatten. Season chicken on both sides with ¼ cup spice mixture, patting to adhere. Chill, uncovered, 3–8 hours.
Boil potatoes in salted water until just tender, 15–20 minutes. Remove from heat and let sit uncovered until ready to use (up to 5 hours).
Preheat oven to 550° (or maximum setting). Place chicken on a foil-lined rimmed baking sheet, leaving wings untucked. Place half of the kimchi butter in small pieces over the chicken and roast until browned but not fully cooked, 20–25 minutes. Arrange bacon, potatoes, and corn around chicken; sprinkle with reserved spice mixture. Roast until an instant-read thermometer inserted into the thickest part of the thigh registers 165°, 10–15 minutes. Transfer to a cutting board and let chicken rest 10 minutes before carving.
Transfer bacon and vegetables to a large bowl and add remaining kimchi butter; toss to melt butter and coat vegetables. Serve alongside chicken.
Heat a large skillet over medium high heat and sauté onions in vegetable oil, stirring occasionally, until caramelized and most of liquid has evaporated, about 15 minutes. Add halved garlic cloves and saute for 3 minutes more. Stir in spices and seasoning (paprika, salt, garlic and onion powders, black pepper, cayenne, oregano and thyme) and cook for 2 minutes. Set aside.
In a large bowl, stir together the beef stock, ketchup, chili sauce and brown sugar.
Cook the Brisket
Lightly grease crockpot. Place brisket in a crockpot (I had to cut my brisket cut in half and stack it to get it to fit), spread onion mixture over the top, then pour sauce mixture over the entire dish. Cover with the lid and cook it on LOW for 10 hours. (I did this overnight.) Do your best to lift the lid up as little as possible, though if you have a section of the meat sticking out of the sauce, rotate it under the sauce for at least a few hours of the cooking time.)
Rest the Brisket
When the brisket is cooked but still hot, use a spoon to scrape off any large fat deposits adhered to the top and bottom of the brisket. (This part is easiest to do when hot. The sauce will be de-fatted after it has chilled.)
Transfer the brisket and all of its sauce to a baking dish. Chill entire dish in the fridge for several hours and up to one day; this resting time will significantly enhance the flavor and texture of the meat (don't be tempted to skip this step; just do it!)
An hour before you’re ready to serve it
Preheat your oven to 300°F, and remove the dish from the fridge. Remove all of the fat that has solidified on top with a slotted spoon for a less oily finish.
Carefully remove the meat from its sauce and place on a large cutting board. Cut the brisket into 1/2-inch slices.
(Optional: you could run your sauce through a food processor for a smoother sauce; I didn't.)
Carefully place the sliced meat (moving it in large sections with a spatula helps keep it together) back into the sauce and spoon the sauce over the meat. Replace the lid or cover the dish tightly with foil and reheat in the oven until it is bubbling at the edges — this usually takes up to to 30 minutes.
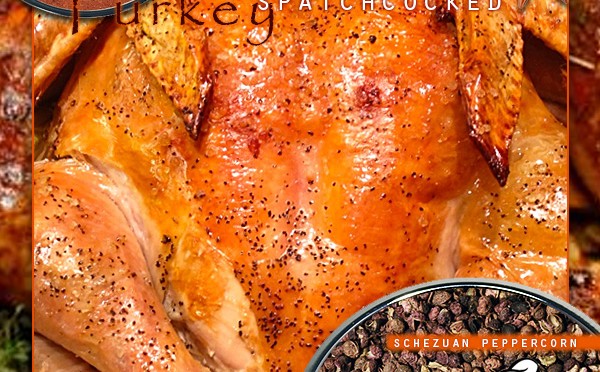
Make the Schezuan dry-brined turkey: Place the coriander, fennel and Schezuan peppercorns in a small skillet over medium heat and toast until fragrant, about 5 minutes. Let the mixture cool, then transfer to a spice grinder and pulse until the spices are coarsely ground. Transfer the spice mix to a small bowl and stir in the salt; set aside.
Place the turkey on a clean work surface and trim off any excess pockets of fat or skin around the turkey. Flip the turkey so it is laying breast-side up. Using the heels of your hands, press down on the center of both breasts until you hear a cracking sound and the bird flattens.
Pat the bird very dry using a kitchen towel and rub the spice mixture on both sides. Transfer the turkey, breast-side up, to a wire-rack placed over a parchment-lined sheet tray. Tuck the wings underneath. Store the turkey in the refrigerator for at least overnight and up to 24 hours.
Remove the turkey an hour before roasting to take the chill off.
Place the reserved backbone and neck in a roasting pan with the carrots, onions, thyme, bay leaf and stock. Place the turkey on a wire rack.
Preheat the oven to 425°. Set one rack in the middle of the oven and another one below for the roasting pan. Place the turkey on the center rack of the oven. Place the roasting pan on the rack below the turkey and roast both for 30 minutes. Reduce the heat to 350° and finish roasting until the turkey is a deep golden brown and crisp or until an instant-read thermometer inserted into the thickest part of the thigh reads 165°, another 40 to 50 minutes. Remove the turkey from the oven and, using two grilling spatulas, transfer the bird to a platter. Let the turkey rest for 30 minutes before carving.
Meanwhile, make the gravy: Transfer the roasted neck-and-backbone turkey mixture along with the stock to a medium saucepan. Bring the liquid to a boil and reduce it by half, 10 minutes. Strain the stock through a fine sieve and discard the solids. Skim the stock of any excess fat before placing it back into the saucepan. Bring to a simmer.
Meanwhile, in a small saucepan over medium heat, melt the butter. When the butter begins to foam, whisk in the flour. Reduce the heat to low and whisk until the roux is golden brown, 2 to 3 minutes.`
Add 1 to 2 cups of hot stock to the roux, whisking constantly. Continue until all the stock has been added. Simmer until the gravy has thickened and the flavors have melded, about 5 minutes. Stir in the cream and season the gravy with salt and pepper. Carve the turkey and serve with the warm gravy.